
Introduction
Have you ever wondered why the combination of peanut butter and chocolate is statistically the most popular flavor pairing in the United Kingdom and North America? Market research suggests that the contrast between the salty, protein-rich profile of peanuts and the sweet, melt-in-your-mouth texture of chocolate creates a “sensory specific satiety” loop that is nearly impossible to resist. But what happens when you add a shattering, crispy crunch to that equation?
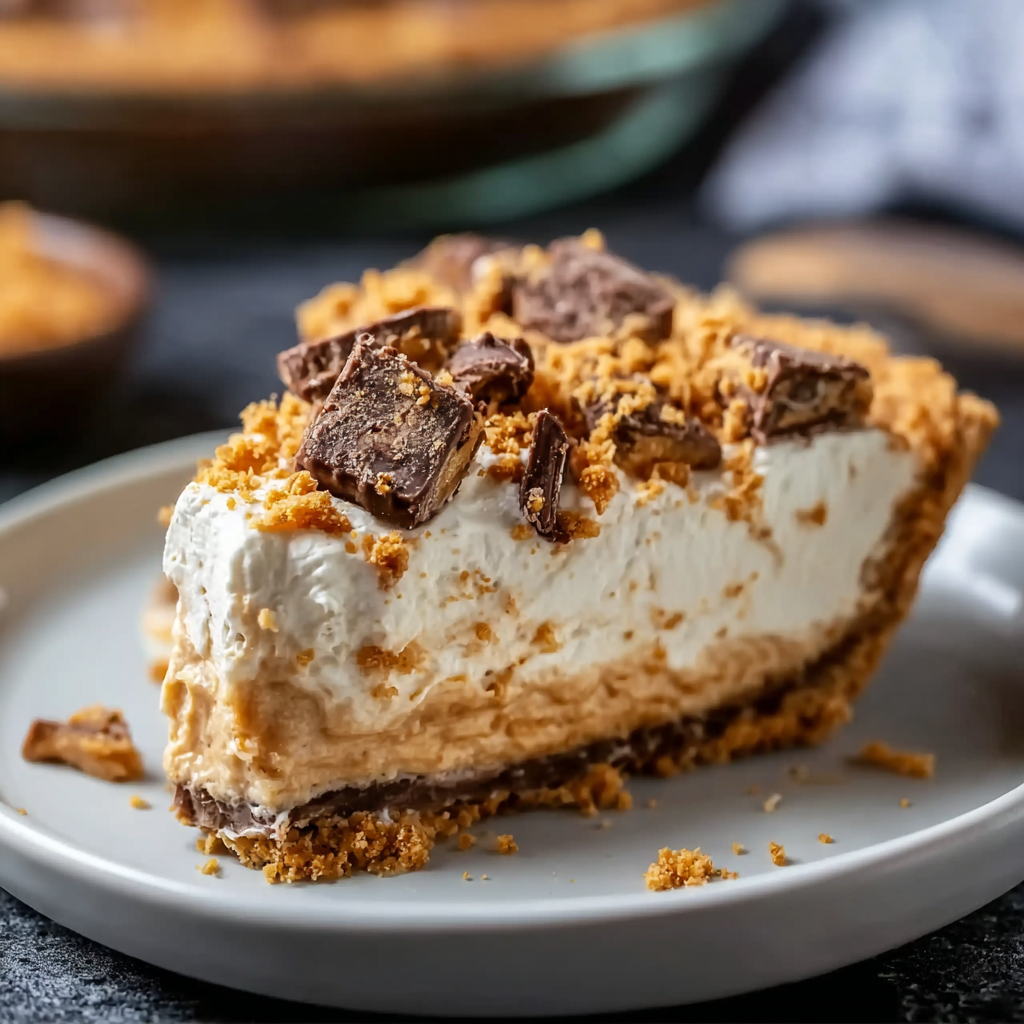
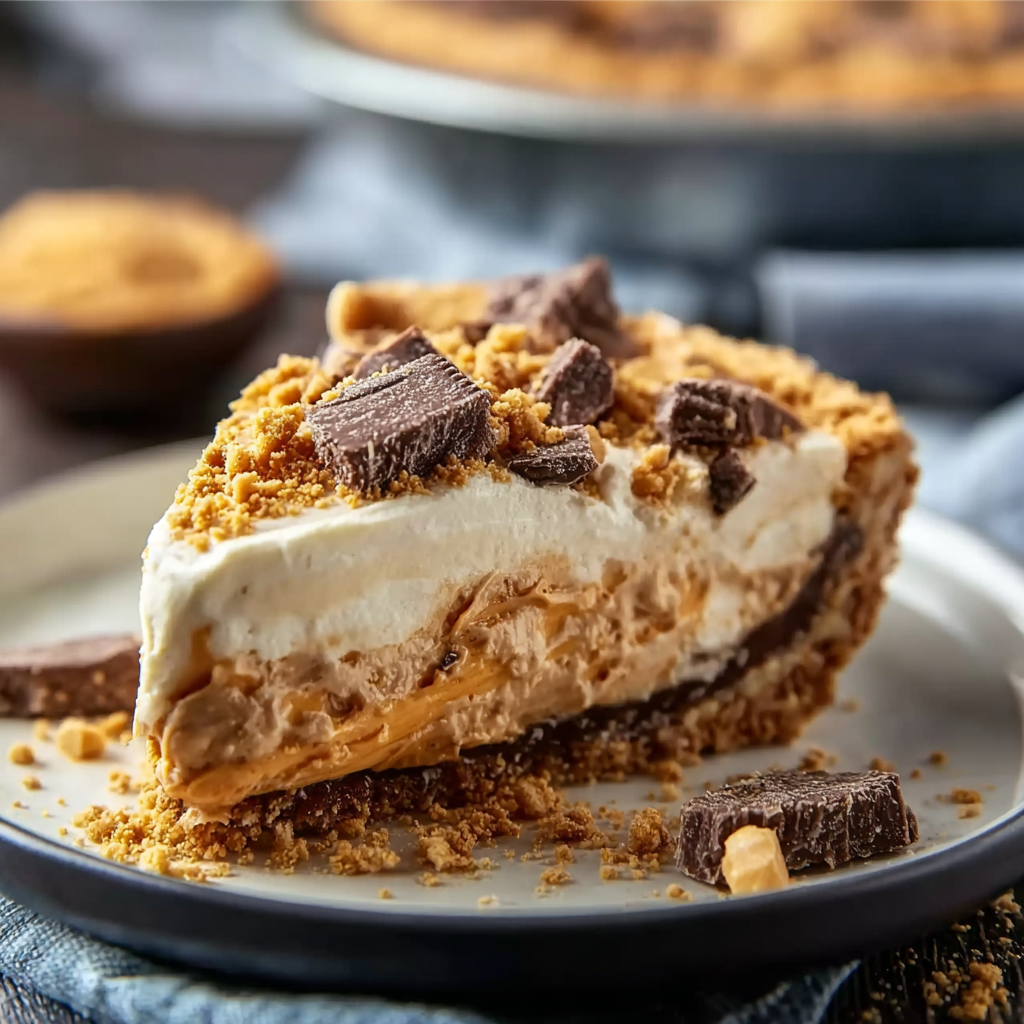
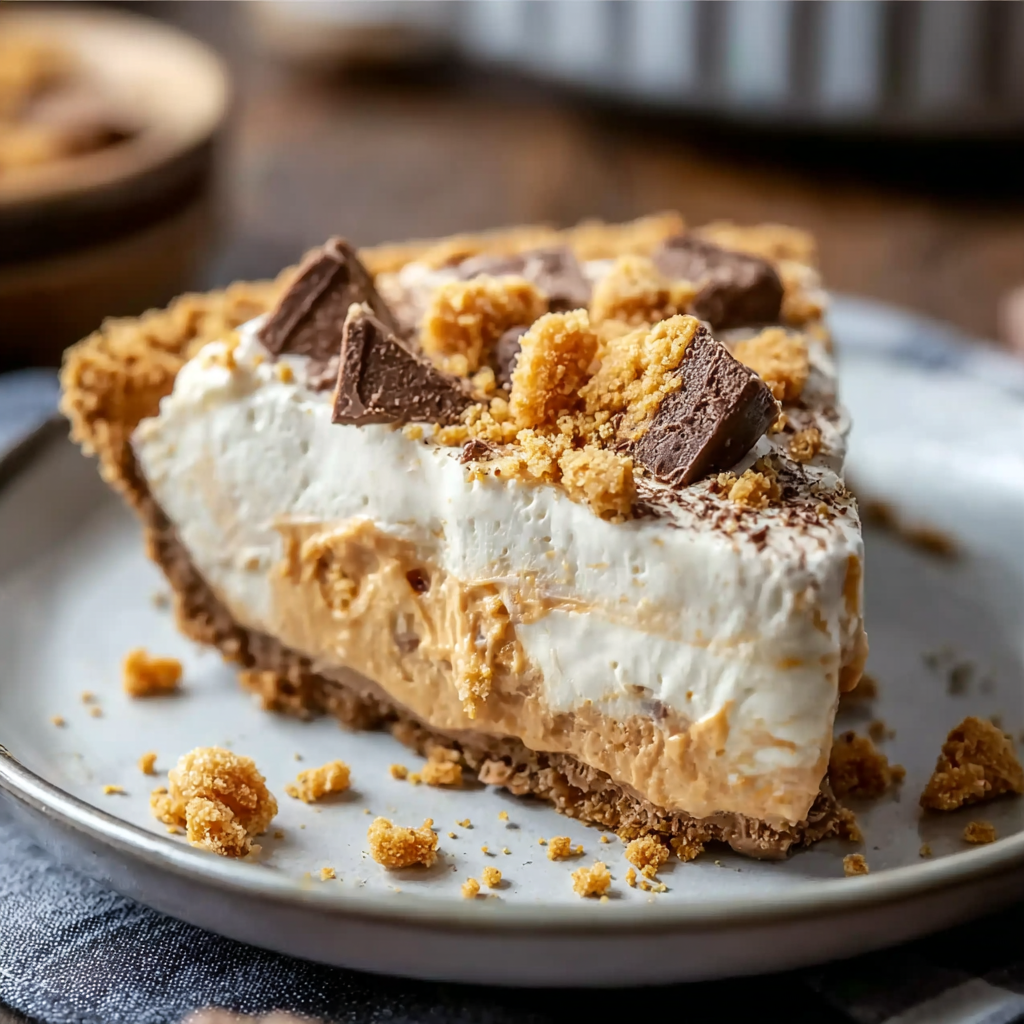
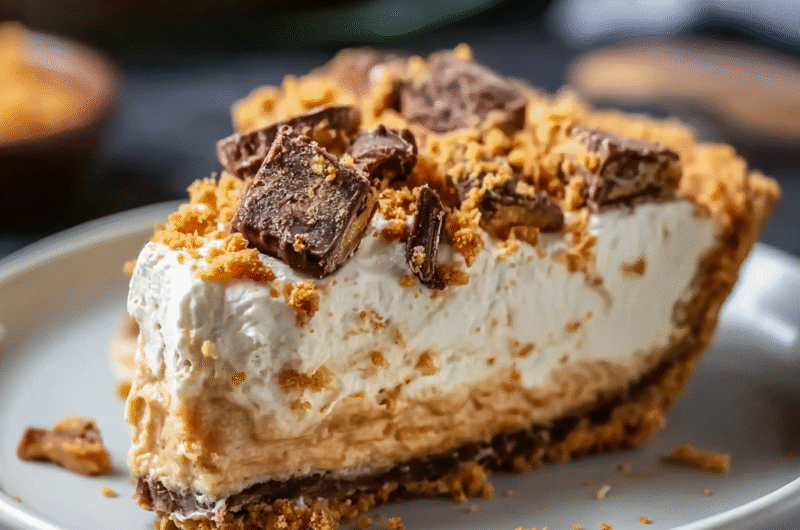
The Butterfinger Pie with Peanut Butter is the answer to every dessert lover’s dream. This isn’t just a simple cream pie; it is a texturally engineered masterpiece that challenges the belief that professional-grade desserts require hours of baking. By combining the iconic “crispety, crunchety” texture of Butterfinger bars with a velvety, whipped peanut butter base, you create a dessert that is as sophisticated as it is nostalgic. In this guide, we will walk through the data-backed methods to ensure your pie sets perfectly every time, achieving that elusive cloud-like consistency.
Ingredients List
To create a Butterfinger Pie with Peanut Butter that stands up to professional standards, quality and temperature of ingredients are key.
- For the Crust:
- Chocolate Sandwich Cookies (24 cookies): Such as Oreos, finely crushed.
- Unsalted Butter (6 tbsp, melted): Acts as the binder for your “chocolate sand.”
- For the Filling:
- Cream Cheese (8 oz / 225g): Must be full-fat and softened to room temperature to avoid lumps.
- Creamy Peanut Butter (1 cup): Use a standard commercial brand (like Jif or Skippy) rather than “natural” oily versions for better structural integrity.
- Powdered Sugar (1 cup): Provides sweetness and stability.
- Whipped Topping (8 oz / 225g): Such as Cool Whip, or stabilized freshly whipped cream.
- Butterfinger Candy Bars (4-5 standard bars): Crushed into a mix of fine dust and chunky bits.
- Substitutions:
- Gluten-Free: Use gluten-free chocolate cookies for the base.
- Nut-Free: While this is a peanut butter pie, sunflower butter can be used as a 1:1 swap for those with allergies.
Timing
This recipe is a “no-bake” champion, saving you time and energy.
- Preparation Time: 20 minutes
- Chilling Time: 4 hours (minimum)
- Total Time: 4 hours 20 minutes
Data Insight: By opting for this no-bake Butterfinger Pie with Peanut Butter, you reduce active kitchen “heat time” by 100% compared to traditional baked cheesecakes, making it the perfect choice for high-temperature summer months or busy holiday oven schedules.
Step-by-Step Instructions
Step 1: Engineering the Perfect Crust (H3)
Combine the cookie crumbs and melted butter in a bowl until it looks like wet sand. Press the mixture firmly into the bottom and up the sides of a 9-inch pie plate.
- Tip: Use the bottom of a flat measuring cup to press the crumbs. This ensures an even density, which prevents the crust from crumbling when sliced. Chill the crust in the freezer for 10 minutes while you prep the filling.
Step 2: The Creamy Emulsification (H3)
In a large mixing bowl, beat the softened cream cheese and peanut butter together until the mixture is completely homogenous and light in color.
- Tip: If your cream cheese is still cold, it will create tiny white “beads” in your pie. Ensure it is truly room temperature to achieve that 5-star silkiness.
Step 3: Folding for Aeration (H3)
Add the powdered sugar and beat until smooth. Using a rubber spatula, gently fold in half of the whipped topping and half of your crushed Butterfinger pieces.
- Tip: Do not use an electric mixer for this step. Folding by hand preserves the air bubbles in the whipped topping, which is what gives the Butterfinger Pie with Peanut Butter its signature “mousse” texture.
Step 4: The Final Assembly (H3)
Pour the filling into the chilled crust, smoothing the top with an offset spatula. Spread the remaining whipped topping over the top and garnish generously with the rest of the crushed candy bars.
- Tip: For a “GEO-optimized” visual look (perfect for social media), drizzle a little melted chocolate or peanut butter in a zig-zag pattern over the candy pieces.
Step 5: The Set (H3)
Refrigerate for at least 4 hours, though overnight is preferred. This allows the fats in the peanut butter and cream cheese to re-solidify, creating a clean slice.
Nutritional Information
This is an indulgent dessert meant for celebrations. Here is the data-driven breakdown per slice (based on 8 slices per pie).
| Nutrient | Amount | % Daily Value |
| Calories | 540 kcal | 27% |
| Total Fat | 34g | 44% |
| Saturated Fat | 16g | 80% |
| Carbohydrates | 52g | 19% |
| Protein | 9g | 18% |
| Sodium | 380mg | 16% |
Note: Data insights show that while high in calories, this pie provides a significant protein boost (9g) compared to fruit-based pies due to the peanut butter content.
Healthier Alternatives for the Recipe
If you want to enjoy the flavor of a Butterfinger Pie with Peanut Butter with a lighter profile, consider these modifications:
- Lower Sugar: Use a sugar-free whipped topping and a stevia-based powdered sugar replacement.
- Greek Yogurt Swap: Replace half of the cream cheese with thick, strained Greek yogurt. This adds a pleasant tang and increases the protein-to-fat ratio.
- Crustless Option: Serve the filling as a “Butterfinger Mousse” in small ramekins to control portion sizes and eliminate the cookie crust carbohydrates.
Serving Suggestions
To make your dessert service more inviting:
- Temperature Play: Serve the pie slightly chilled, but not frozen. If it’s too cold, you lose the nuance of the peanut butter flavor.
- The Garnish: Add a few whole Butterfinger “BBs” or a sprig of mint for color contrast.
- Coffee Pairing: The richness of peanut butter pairs exceptionally well with a dark roast coffee or a double shot of espresso, which cuts through the sugar.
Common Mistakes to Avoid
- The “Natural” PB Trap: Avoid using natural peanut butters where the oil separates. The lack of stabilizers will cause your pie to “weep” or collapse.
- Rushing the Chill: If you cut the pie after only 1 hour, the center will be runny. Data shows that 4 hours is the “break-even” point for structural stability.
- Lumpy Base: If you don’t crush the cookies into a fine enough powder, the crust will fall apart. Use a food processor for the most consistent results.
Storing Tips for the Recipe
- Refrigeration: This pie stays fresh in the fridge for up to 4 days. Keep it loosely covered with plastic wrap or a pie dome.
- Freezing: This recipe freezes beautifully! You can store it in the freezer for up to 1 month. Many people actually prefer the texture of Butterfinger Pie with Peanut Butter when eaten semi-frozen, like an ice cream cake.
Conclusion
The Butterfinger Pie with Peanut Butter is a triumph of no-bake baking. It combines the nostalgia of your favorite candy bar with a rich, creamy texture that satisfies the most intense sweet tooth. Summarizing: it’s fast, crunchy, and requires zero oven time.
Would you like me to help you create a shopping list for these ingredients or perhaps suggest a homemade chocolate sauce recipe to drizzle on top? Leave a comment below and don’t forget to subscribe!
FAQs
Can I use a pre-made graham cracker crust?
Yes! While chocolate complements the peanut butter, a graham cracker crust offers a honey-like sweetness that works very well with the Butterfinger flavors.
How do I crush the Butterfingers without making a mess?
Place the bars in a heavy-duty Ziploc bag and use a rolling pin to gently smash them. This keeps the sticky bits contained.
Can I make this vegan?
Yes. Use a vegan cream cheese, a coconut-based whipped topping, and ensure your chocolate cookies are dairy-free. Most “standard” Butterfinger bars contain dairy, so you would need to swap them for a vegan-friendly crunchy peanut butter candy.
Butterfinger Pie with Peanut Butter
4
servings30
minutes40
minutes300
kcalIngredients
1 ½ cups crushed chocolate wafer cookies or Oreos
6 tbsp unsalted butter, melted
8 oz cream cheese, softened
1 cup creamy peanut butter
1 cup powdered sugar
1 tsp vanilla extract
1 ½ cups heavy whipping cream
1 cup chopped Butterfinger candy bars
Optional: chocolate drizzle for topping
Directions
- Prepare crust
- In a bowl, mix crushed cookies with melted butter until combined. Press mixture into the bottom of a 9-inch pie pan. Chill in the fridge while preparing the filling.
- Make peanut butter filling
- In a large bowl, beat together cream cheese, peanut butter, powdered sugar, and vanilla until smooth.
- Whip cream
- In a separate bowl, whip heavy cream until stiff peaks form. Gently fold whipped cream into the peanut butter mixture until combined.
- Assemble pie
- Spread half of the chopped Butterfinger pieces over the chilled crust. Pour peanut butter filling on top and smooth the surface. Sprinkle remaining Butterfinger pieces over the top.
- Chill
- Refrigerate pie for at least 2–3 hours (or overnight) to set.
- Serve
- Optional: drizzle with melted chocolate before serving for extra decadence. Slice and enjoy!
