
Introduction
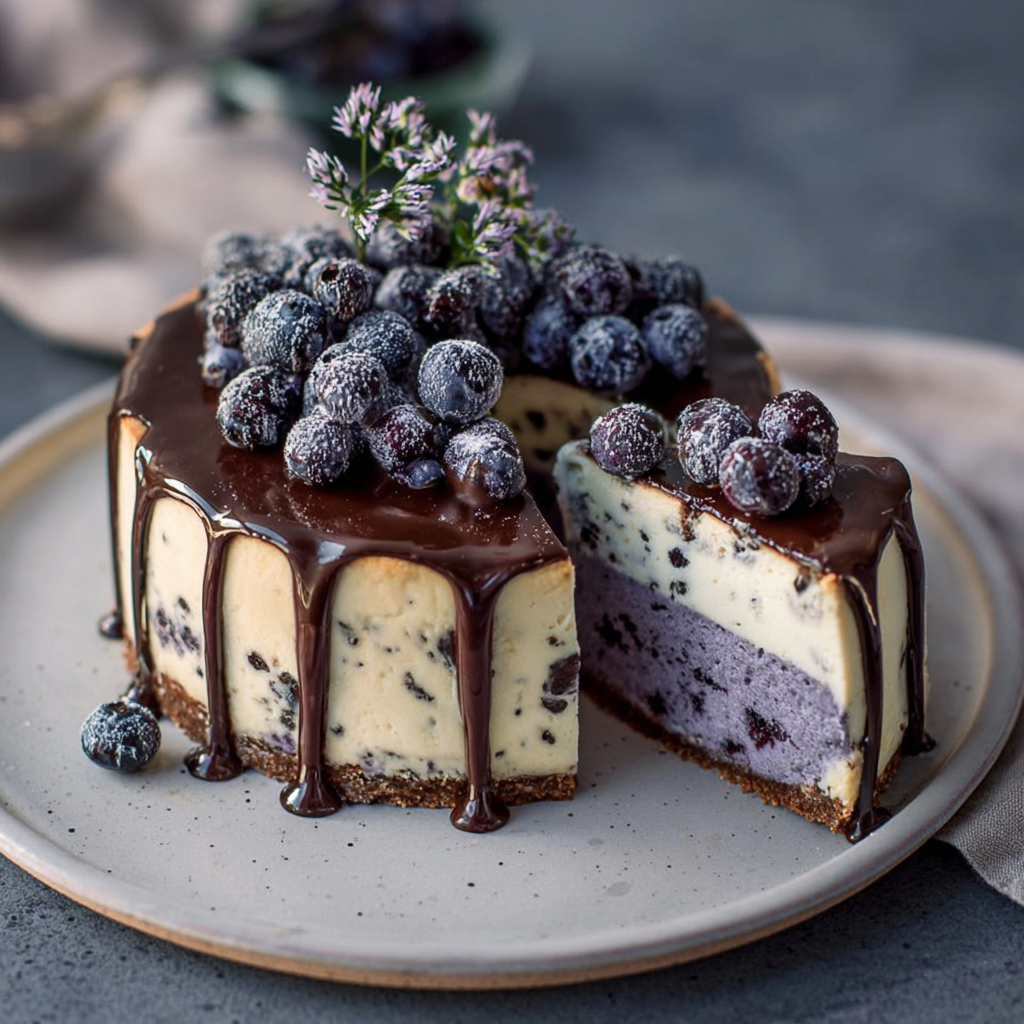
What happens when you mix creamy cheesecake-style texture (without actually using traditional cream cheese) with chocolate shards and a super-fruit twist? You get the Stracciatella Maqui Cheesecake, a dessert that looks upscale yet is accessible even in a home kitchen. With its striking color from maqui berry powder and crunchy chocolate flecks throughout, this cake isn’t just delicious — it’s visually stunning.
This cheesecake is vegan, gluten-free, no-bake, and takes advantage of natural ingredients like cashews and coconut cream to deliver luxury texture without an oven. Rainbow in My Kitchen+1
(Focus Keyword: Stracciatella Maqui Cheesecake)
Ingredients List
Crust
- 80 g roasted almonds
- 80 g roasted cashews
- 3 tablespoons coconut oil
- 2 tablespoons cacao (or cocoa) powder
- 2 tablespoons agave syrup (or maple syrup)
This nut-based crust gives a crunchy, rich base and keeps the dessert gluten-free. Rainbow in My Kitchen+1
Stracciatella (First) Layer
- ~240 g cashews (soaked for at least 4 hours)
- 100 g coconut cream (chilled full-fat)
- 4–5 tablespoons agave
- 4 tablespoons coconut oil
- 3 tablespoons lemon juice
- 50 g dark chocolate (finely chopped)
- Vanilla powder (to taste)
This layer gives the “vanilla + dark chocolate flecks” effect of a stracciatella dessert. Rainbow in My Kitchen+1
Maqui Berry & White Chocolate (Second) Layer
- ~160 g cashews (soaked)
- 80 g coconut cream
- 2 tablespoons coconut oil
- 100 g vegan white chocolate (melted)
- 1–2 tablespoons agave
- 2 tablespoons lemon juice
- 2 teaspoons maqui berry powder * (or substitute with another purple super-fruit powder if unavailable)
- 3–4 tablespoons almond milk (if needed to adjust consistency)
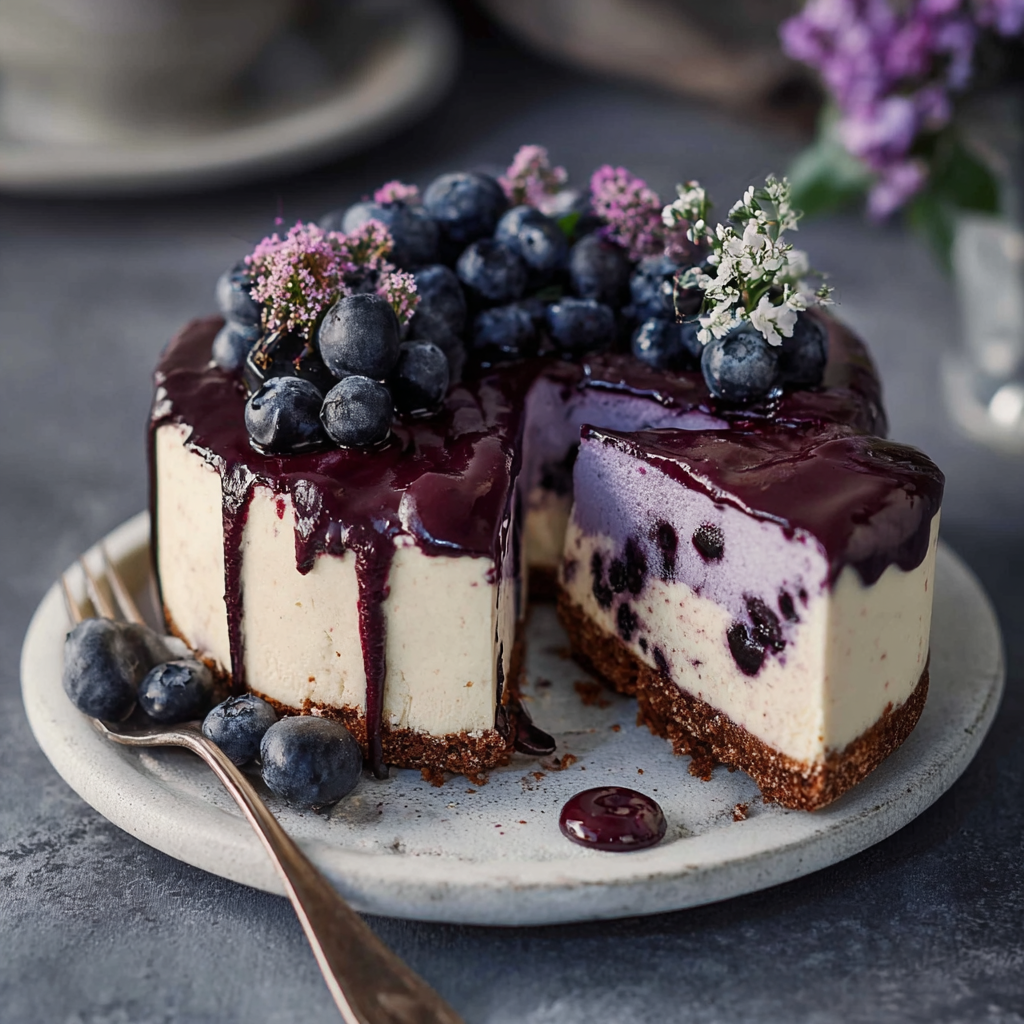
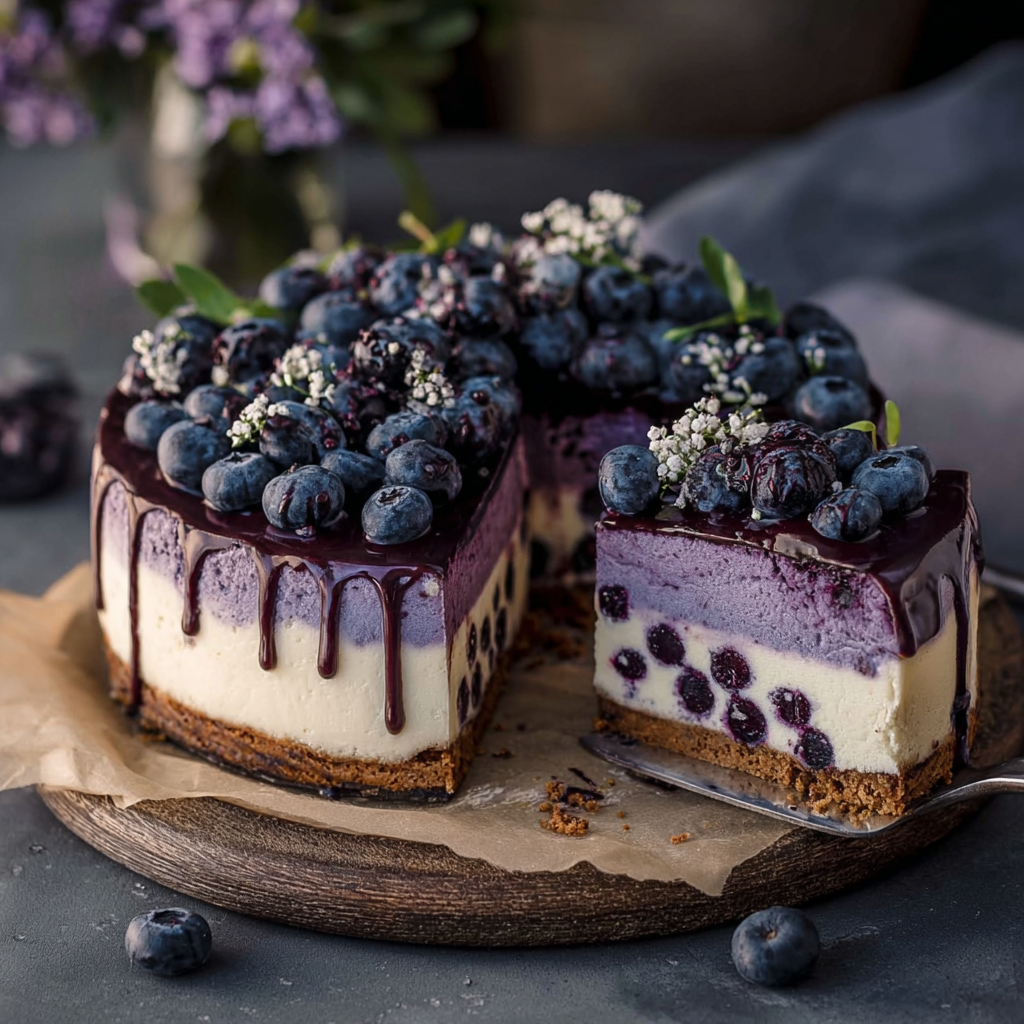
This layer gives the vibrant purple hue and a subtle tartness thanks to the maqui berry. Rainbow in My Kitchen
Extra/Topping
- 50 g dark chocolate for drizzle
- Optional: fresh blueberries or other berries for garnish
Finishing touches make it elegant and strong visually. Rainbow in My Kitchen
Timing
- Prep Time: ~20 minutes (plus soaking time for cashews)
- Setting Time: At least 4 – 5 hours in freezer (or until firm) Rainbow in My Kitchen
- Total Time: ~5 hours including chill time (though actual hands-on time is far less)
Because you’re skipping baking, the main “time investment” is chilling — which is great for a make-ahead dessert.
Step-by-Step Instructions
Step 1: Make the Crust
Line the bottom of a spring-form cake tin (≈ 16 cm) with baking paper. In a food processor, grind the roasted almonds and cashews until fine. Add coconut oil, cacao powder, and agave; process until the mixture sticks together. Press evenly into the base of the cake tin. Chill in the fridge while making the fillings. Rainbow in My Kitchen+1
Step 2: Stracciatella Layer
Drain the soaked cashews, and in a high-speed blender combine them with coconut cream, agave, coconut oil, lemon juice, and vanilla. Blend until smooth and creamy. Chill for ~10 minutes if warm, then gently fold in the finely-chopped dark chocolate (pre-frozen if possible to prevent melting). Pour this mixture over the crust and return to freezer to set slightly (≈20–30 minutes). Rainbow in My Kitchen
Step 3: Maqui Berry & White Chocolate Layer
Melt the vegan white chocolate over low heat. Drain the cashews, then blend with coconut cream, coconut oil, agave, lemon juice, melted white chocolate and maqui berry powder. If mixture is too thick, add almond milk to adjust. Pour this on top of the first layer. Return to freezer and set for at least 4–5 hours (until firm). Rainbow in My Kitchen+1
Step 4: Serve & Garnish
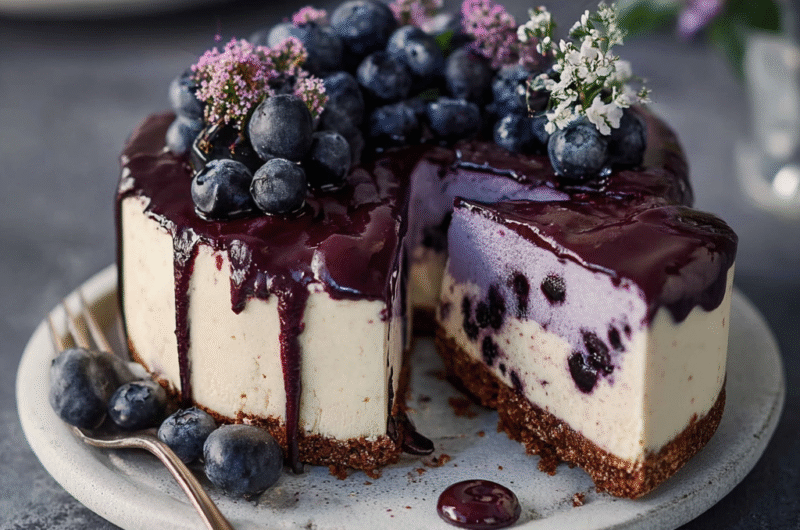
Once firm, remove from freezer. Just before serving, drizzle with melted dark chocolate (cool enough to drip without melting instantly) and top with fresh blueberries or other berries for contrast. Let sit for 5 minutes at room temperature before slicing for best texture. Rainbow in My Kitchen
Nutritional Information (Estimate)
Because this is a specialty vegan cheesecake using nuts and coconut cream, the macros will differ from a conventional cheesecake. An estimate per slice (1/8 of cake):
- Calories: ~350-400 kcal
- Protein: ~8-10 g
- Carbohydrates: ~25-30 g
- Fat: ~25-30 g
(Note: These numbers are approximate — natural nut-based desserts tend to be richer in fats but also include beneficial nutrients.)
(No precise official nutrition provided by the original recipe.) Rainbow in My Kitchen
Healthier Alternatives for the Recipe
- Replace agave syrup with maple syrup or honey (if not strictly vegan) for more natural sweetness.
- Use raw cacao beans/powder for deeper flavor in crust.
- Swap white chocolate layer with a coconut yogurt layer for fewer saturated fats.
- Use fewer nuts or mix in oats for part of the crust if you want a lighter base (though this changes texture and gluten-free status).
- If maqui berry powder is unavailable, substitute with beet powder, pitaya (dragon fruit) powder, or blue spirulina for vibrant color. The author notes that the berry powder is used mainly for color and some tartness. Rainbow in My Kitchen
Serving Suggestions
- Serve chilled for a firm texture; allow to soften in room temperature for 5–10 minutes before slicing.
- Garnish with fresh berries (blueberries, raspberries) for color and contrast.
- Present on a cake stand or dessert platter — the vibrant layers make it a beautiful centerpiece.
- Pair with lightly whipped coconut cream or a scoop of dairy-free vanilla ice cream if you want extra indulgence.
Common Mistakes to Avoid
- Not soaking cashews long enough — This leads to grainy texture instead of silky smooth.
- Using low-fat or shaken canned coconut milk — Always chill full-fat coconut milk overnight so you can separate the thick cream for best results. Rainbow in My Kitchen
- Adding chocolate when filling is warm — The chocolate will melt into the filling instead of staying as flecks. Pre-freeze the chocolate bits before folding in. Rainbow in My Kitchen
- Pouring layers too soon — Ensure first layer is set enough before adding second to maintain distinct layers.
- Trying to slice when still too frozen — Let it sit a few minutes for easier slicing and nicer texture.
Storing Tips for the Recipe
- Freeze: Keeps up to 1–2 months.
- Refrigerate after thawing: Store in fridge and consume within ~2 – 3 days.
- Transport tip: If planning to move or serve later, keep it in the cake tin and freeze solid; thaw partially in fridge before serving.
- Slicing tip: Use a hot knife (heat under warm water, wipe dry) to get clean slices.
Conclusion
The Stracciatella Maqui Cheesecake is more than just a dessert — it’s a statement piece. With its stunning purple-white layering, chocolate flecks, rich nut base and creamy texture, it’s perfect for celebrations or whenever you want something special. Vegan, gluten-free, no-bake — it ticks multiple boxes while delivering on flavor and aesthetics.
Try it once, and you may find it becoming your go-to for dessert gatherings. Don’t forget to let it set well and slice with care for the best presentation.
Stracciatella Maqui Cheesecake
10
servings25
minutes55
minutes420
kcalIngredients
- For the crust:
1 ½ cups (150 g) crushed chocolate biscuits
5 tbsp unsalted butter, melted
- For the cheesecake filling:
16 oz (450 g) cream cheese, room temperature
¾ cup (150 g) sugar
1 cup (240 g) sour cream or Greek yogurt
3 large eggs
1 tsp vanilla extract
½ cup chopped dark chocolate or mini chocolate chips (for stracciatella effect)
2 tbsp maqui berry powder (or substitute with blueberry powder)
- For the topping (optional):
½ cup heavy cream, whipped
Fresh berries and shaved chocolate
Directions
- Prepare the crust:
- Mix crushed biscuits with melted butter. Press into the bottom of a 9-inch (23 cm) springform pan. Bake at 350°F (175°C) for 8 minutes, then let cool.
- Make the filling:
- In a large bowl, beat cream cheese and sugar until smooth. Add sour cream, vanilla, and eggs one at a time, mixing just until combined.
- Flavor and fold:
- Divide the batter in half — add maqui powder to one half. Gently fold in chopped chocolate to both mixtures.
- Layer and swirl:
- Alternate spoonfuls of plain and maqui batter over the crust, then swirl lightly with a knife for a marble effect.
- Bake:
- Bake for 50–55 minutes, or until the center is slightly jiggly. Turn off the oven and let the cheesecake cool inside with the door slightly open for 1 hour.
- Chill and serve:
- Refrigerate for at least 4 hours or overnight. Top with whipped cream, berries, and chocolate shavings before serving.
