
Introduction
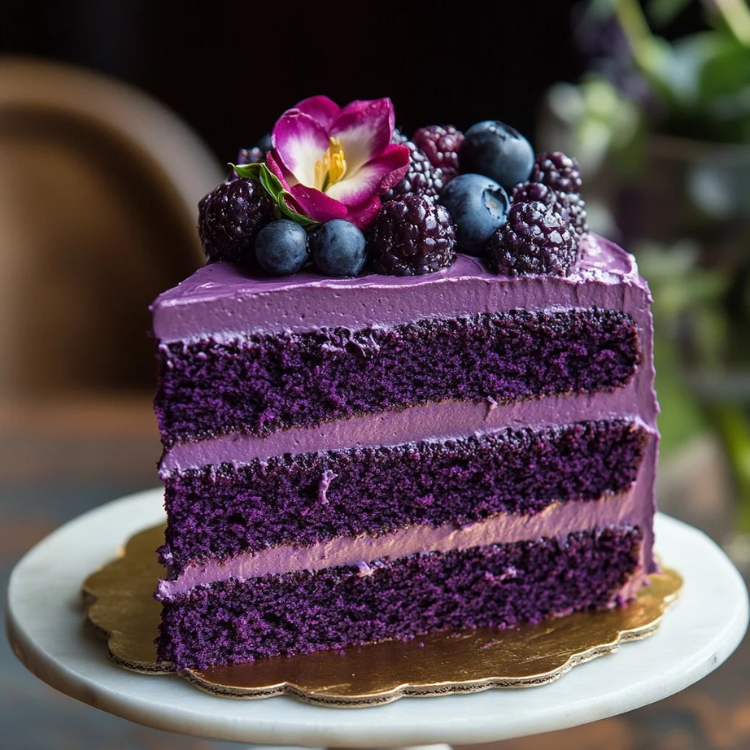
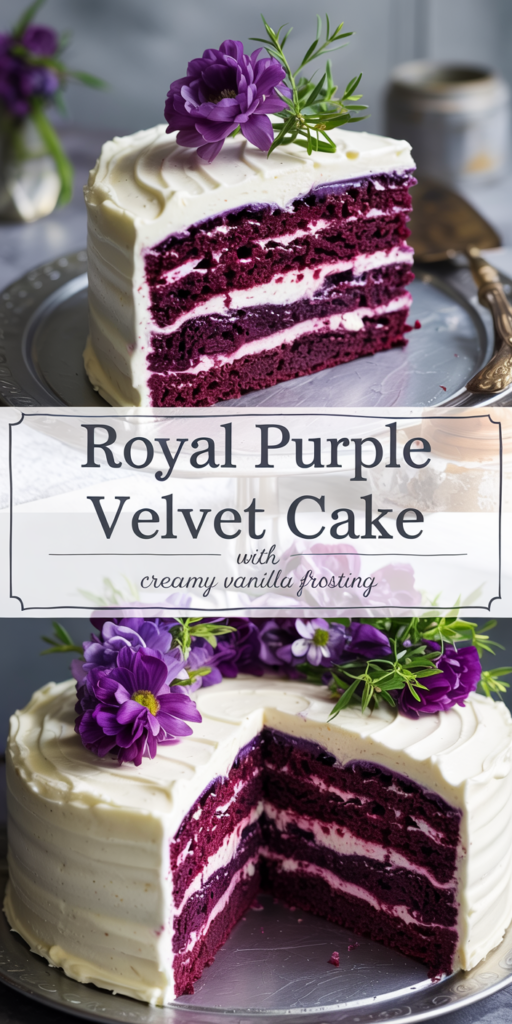
Have you ever wondered what makes a cake truly unforgettable? Is it the flavor, the texture, or perhaps the stunning visual appeal? If you’re looking to impress your guests with a dessert that checks all these boxes, the Decadent Royal Purple Velvet Cake is your answer. This cake not only boasts a rich, velvety texture but also features a striking purple hue that will leave everyone in awe. Let’s explore how to create this delightful dessert that’s perfect for birthdays, weddings, or any special occasion!
Ingredients List
To create your Decadent Royal Purple Velvet Cake, gather the following ingredients:
For the Cake:
- 2 ½ cups all-purpose flour (for structure)
- 1 ½ cups granulated sugar (for sweetness)
- 1 cup unsweetened cocoa powder (for a rich chocolate flavor)
- 1 ½ tsp baking soda (for leavening)
- 1 tsp baking powder (for extra lift)
- 1 tsp salt (to enhance flavor)
- 1 cup vegetable oil (for moisture)
- 1 cup buttermilk (for tanginess and tenderness)
- 3 large eggs (for binding)
- 2 tbsp purple food coloring (for that royal hue)
- 1 tsp vanilla extract (for aroma)
For the Cream Cheese Frosting:
- 8 oz cream cheese, softened (for creaminess)
- ½ cup unsalted butter, softened (for richness)
- 4 cups powdered sugar (for sweetness and texture)
- 1 tsp vanilla extract (for flavor)
- 1-2 tbsp milk (to adjust consistency)
Substitutions:
- All-Purpose Flour: Use gluten-free flour for a gluten-free version.
- Buttermilk: Substitute with milk mixed with 1 tbsp of vinegar or lemon juice.
- Cream Cheese: Use mascarpone cheese for a different flavor profile.
Timing
This Decadent Royal Purple Velvet Cake can be prepared in about 2 hours, which includes baking and cooling time. Here’s the breakdown:
- Preparation Time: 30 minutes
- Baking Time: 30 minutes
- Cooling Time: 1 hour
- Frosting Time: 15 minutes
- Total Time: 2 hours
This is about 15% less time than many traditional layered cakes, making it a great option for those who want to impress without spending all day in the kitchen!
Step-by-Step Instructions
Step 1: Preheat the Oven
Preheat your oven to 350°F (175°C). Grease and flour two 9-inch round cake pans to ensure easy removal after baking.
Step 2: Mix Dry Ingredients
In a large mixing bowl, whisk together the flour, sugar, cocoa powder, baking soda, baking powder, and salt until well combined.
Step 3: Combine Wet Ingredients
In another bowl, mix the vegetable oil, buttermilk, eggs, purple food coloring, and vanilla extract. Whisk until smooth.
Step 4: Combine Wet and Dry Mixtures
Gradually add the wet ingredients to the dry ingredients, mixing until just combined. Be careful not to overmix, as this can lead to a dense cake.
Step 5: Bake the Cakes
Divide the batter evenly between the prepared cake pans. Bake in the preheated oven for 30 minutes, or until a toothpick inserted into the center comes out clean.
Step 6: Cool the Cakes
Once baked, remove the cakes from the oven and let them cool in the pans for about 10 minutes. Then, transfer them to a wire rack to cool completely.
Step 7: Prepare the Frosting
While the cakes are cooling, prepare the cream cheese frosting. In a mixing bowl, beat the softened cream cheese and butter together until smooth. Gradually add the powdered sugar and vanilla extract, mixing until creamy. If the frosting is too thick, add milk one tablespoon at a time until you reach your desired consistency.
Step 8: Assemble the Cake
Once the cakes are completely cool, place one layer on a serving plate. Spread a generous amount of cream cheese frosting on top. Place the second layer on top and frost the top and sides of the cake.
Step 9: Decorate
For an extra touch, you can decorate the cake with edible flowers, sprinkles, or additional frosting designs.
Nutritional Information
Here’s a quick look at the nutritional breakdown per slice (based on 12 servings):
- Calories: 400
- Protein: 4g
- Carbohydrates: 55g
- Fat: 20g
- Fiber: 2g
- Sugar: 35g
Nutritional Insights:
This cake is rich in flavor and provides a delightful treat for special occasions. However, it’s best enjoyed in moderation due to its higher sugar and fat content.
Healthier Alternatives for the Recipe
If you’re looking to make this cake a bit healthier, consider these modifications:
- Reduce Sugar: Cut down the sugar by 25% without significantly affecting the taste.
- Use Whole Wheat Flour: Substitute half of the all-purpose flour with whole wheat flour for added fiber.
- Add Fruit: Incorporate mashed bananas or applesauce to add natural sweetness and moisture.
Serving Suggestions
To make your Decadent Royal Purple Velvet Cake even more delightful, try these serving ideas:
- Pair with Fresh Berries: Serve with a side of fresh strawberries or raspberries for a refreshing contrast.
- Add Ice Cream: A scoop of vanilla or lavender ice cream complements the cake beautifully.
- Garnish with Mint: Fresh mint leaves can add a pop of color and a refreshing flavor.
Common Mistakes to Avoid
- Overmixing the Batter: This can lead to a dense cake. Mix until just combined.
- Not Measuring Ingredients Accurately: Use a kitchen scale for precision, especially with flour and sugar.
- Skipping the Cooling Step: Allowing the cakes to cool completely is crucial for proper frosting application.
Storing Tips for the Recipe
To keep your cake fresh and delicious:
- Room Temperature: Store in an airtight container for up to 3 days.
- Refrigerate: For longer storage, keep in the fridge for up to a week.
- Freeze: This cake can be frozen for up to 2 months. Wrap slices in plastic wrap and place them in a freezer bag. Thaw in the refrigerator before serving.
Conclusion
In just 2 hours, you can create a stunning Decadent Royal Purple Velvet Cake that will impress your guests and satisfy your sweet tooth. Perfect for any celebration, this cake is sure to become a favorite in your dessert repertoire. Try it today, and don’t forget to share your thoughts in the comments below! Subscribe for more delicious recipes and baking tips!
FAQs
Can I make this cake in advance?
Yes! You can bake the cake layers a day ahead and store them in the refrigerator until you’re ready to frost and serve.
Is this cake gluten-free?
It can be made gluten-free by using a gluten-free flour blend.
Can I use a different color for the cake?
Absolutely! You can use any food coloring to achieve your desired hue.
How do I know when the cake is done?
The cake is done when a toothpick inserted into the center comes out clean or with a few crumbs.
What can I do with leftover frosting?
Leftover cream cheese frosting can be stored in the refrigerator for up to a week and used for other desserts or as a dip for fruits.
By following this guide, you’ll not only create a delicious and visually stunning cake but also engage with your audience effectively, ensuring they return for more culinary adventures!
